
Ultimate Guide to Prototyping in Figma
Figma is a great tool for prototyping UX/UI designs. It allows you to create interactive flows directly in the design file with advanced, yet easy-to-use features. In just a few minutes, you can turn your static designs into a realistic version of your website or product.
Creating prototypes is important for many reasons. You can explore how new user flows will work. Communicate interactions to your team. Test and get feedback from your users. And pitch designs to stakeholders for buy-in.
In this guide, you'll learn
- Prototyping 101
- How to add prototype flows
- How to add interactions (instant, animated, smart animated)
- How to create a fixed position
- How to add overflow scrolling
- How to create interactive components
- How to present and share your prototype
👀 Follow along with our (free) Prototype Playground for Figma. Included is an example of every prototype from this article (11 in total). Along with step-by-step instructions on how to re-create all the interactions yourself.
Prototyping 101
First, let's go over some prototyping basics. Organize your designs and get familiar with the most important prototyping features. This will protect your designs and speed up your workflow.
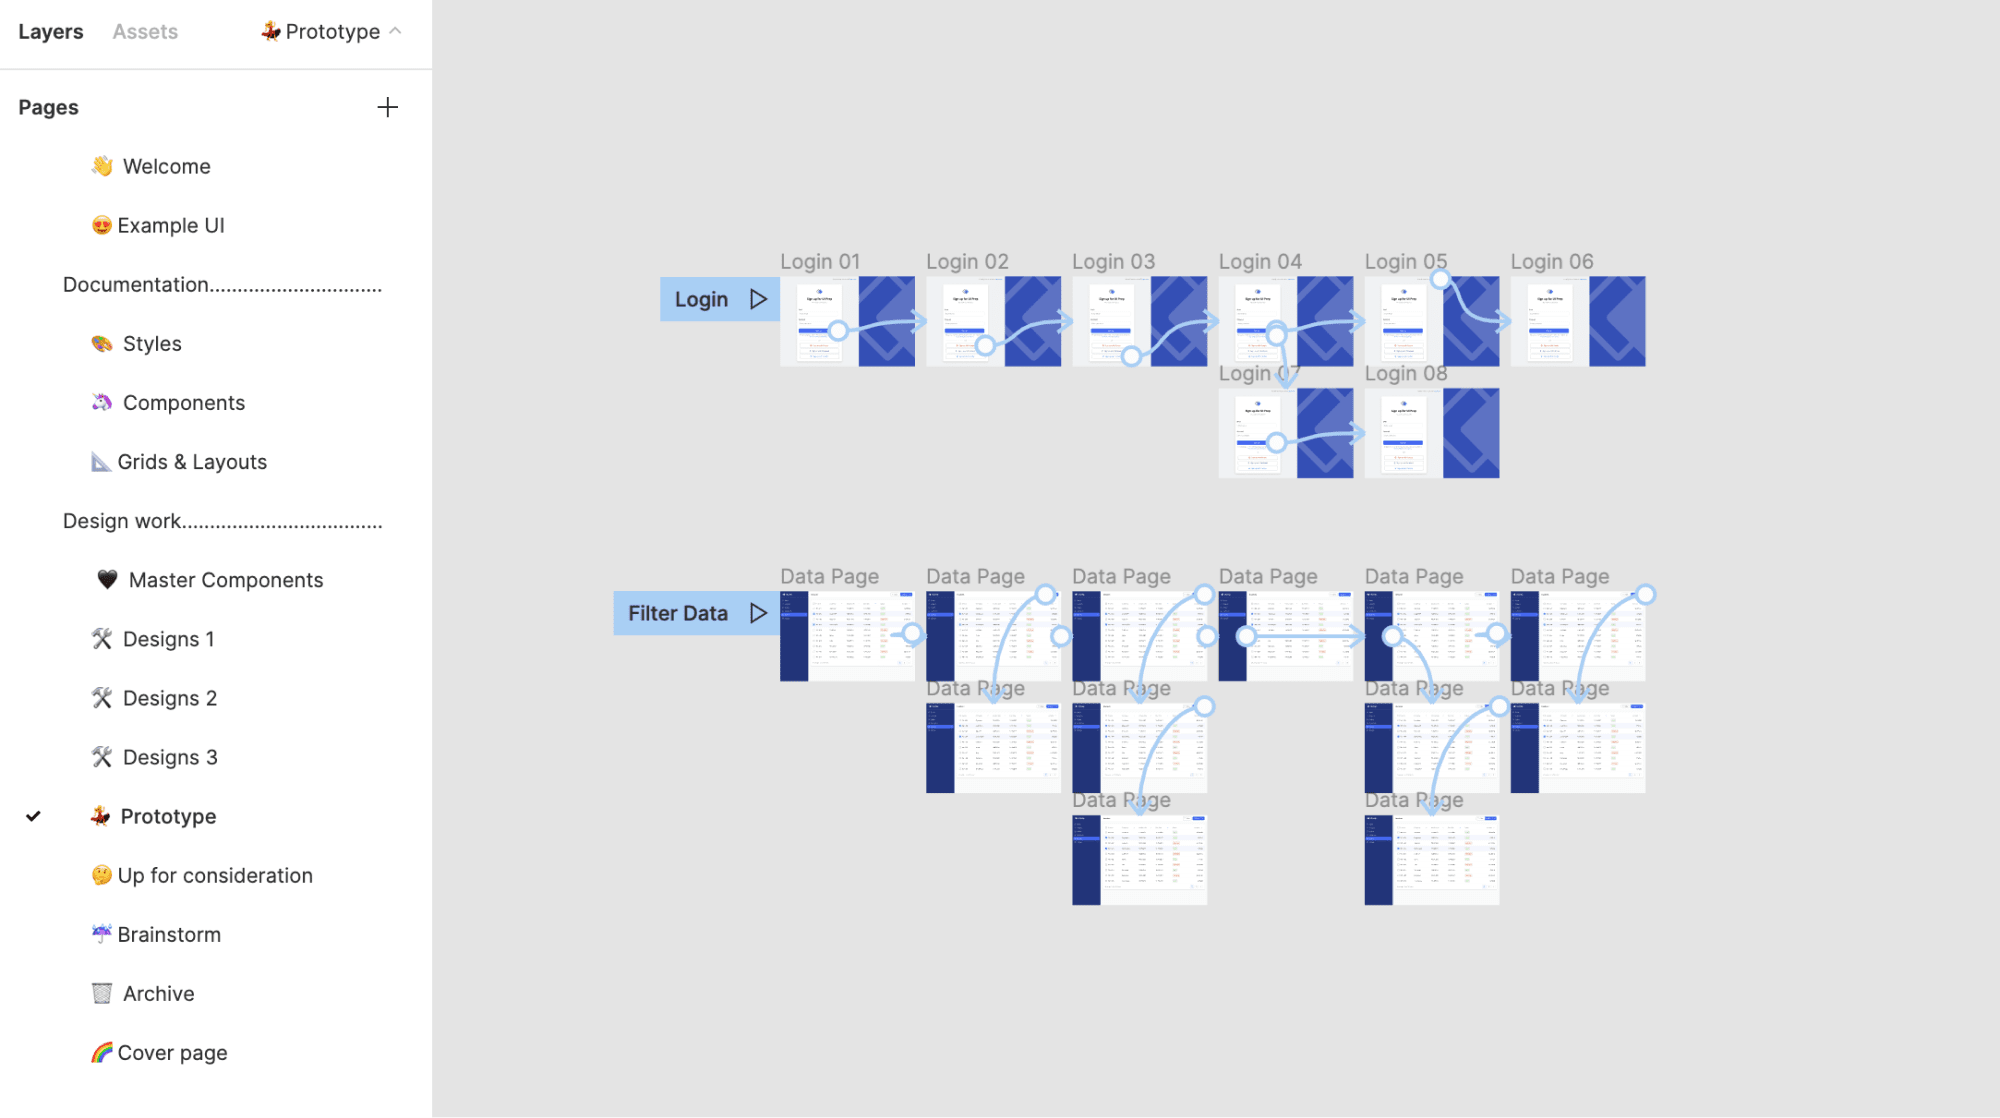
Get organized
When you're ready to start prototyping, add a copy of every screen and component needed to a new page. Arrange everything in a logical order with clear, identifiable names. Using copies will allow you to use the same designs in many prototypes. While also keeping the originals safe and organized.
Pro tip: Turn frequently used screens into main components to reduce maintenance.
Access key features
Assess (almost) all prototype features in the right-hand panel under "Prototype".
A. Prototype panel
B. Add a new prototype flow
C. Add and configure interactions
D. Add and configure overflow scrolling
E. Configure prototype settings
F. Present prototype

Add prototype flows
Each page in your Figma file can have one or many prototype flows. Each one needs to have its own starting point and unique name. Select the first frame you wish to appear in your flow and click the "Add" icon next to "Flow Starting Point". Once added, rename the flow by clicking on the name input. Add a description by clicking the "Edit" icon next to the flow name. To remove the starting point click the "Delete" icon next to "Flow Starting Point"
Add interactions
Interactions are the primary feature used when building a prototype. Use them to show different behaviors, effects, and navigational patterns. They work by connecting two layers, then determining how those layers will interact with each other by adding a trigger, action, and animation. Interactions can be simple with instate animations. Or they can be more complex with animated elements that move or change properties.
Trigger: The event that causes a change (on tap/click, on drag, while hovering, while pressing, key/gamepad, mouse enter, mouse leave, mouse down (click), mouse up (release)).
Action: The change that is happening (navigate to, change to, open overlay, swap overlay, close overlay, back, scroll to, open link).
Animation: The behavior of the change (instant, dissolve, smart animate, move in, move out, push, slide in, slide out).
Connect layers
Add a connection between any two layers (e.g. frames, groups, shapes, text layers, etc..). To add a connection, hover over or select the first layer and drag the blue node that appears to the second layer. The "Interaction Details" menu will then appear. The first layer will become a new flow starting point if has no other connections.
Pro Tip: If navigating to a far away frame, select your first layer and click the "Add" icon next to "Interactions". Once added, select the frame you wish to navigate to from the dropdown menu.
Instant interactions
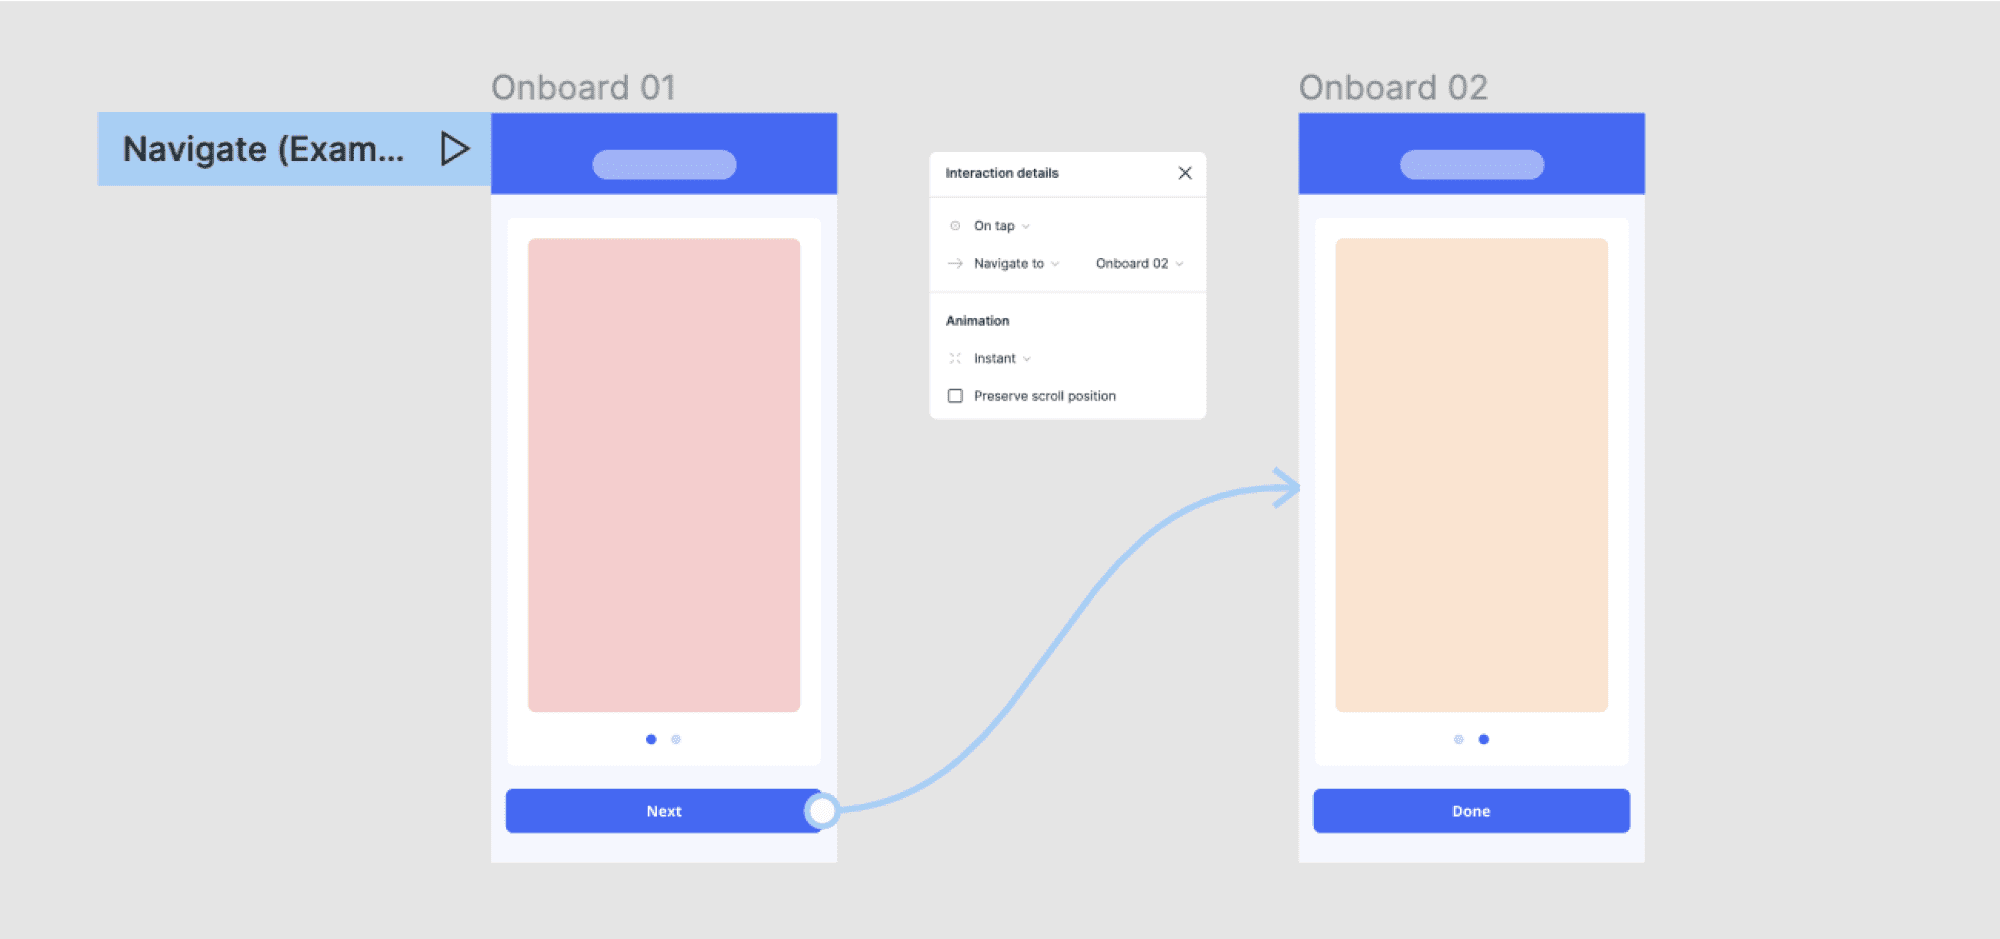
Use "instant" animations to have the action take place with no movement or effect. This is great for actions like navigating between pages or showing a modal/tooltip.
Example: navigate between pages
Tap a button to navigate to new page with an instant animation.
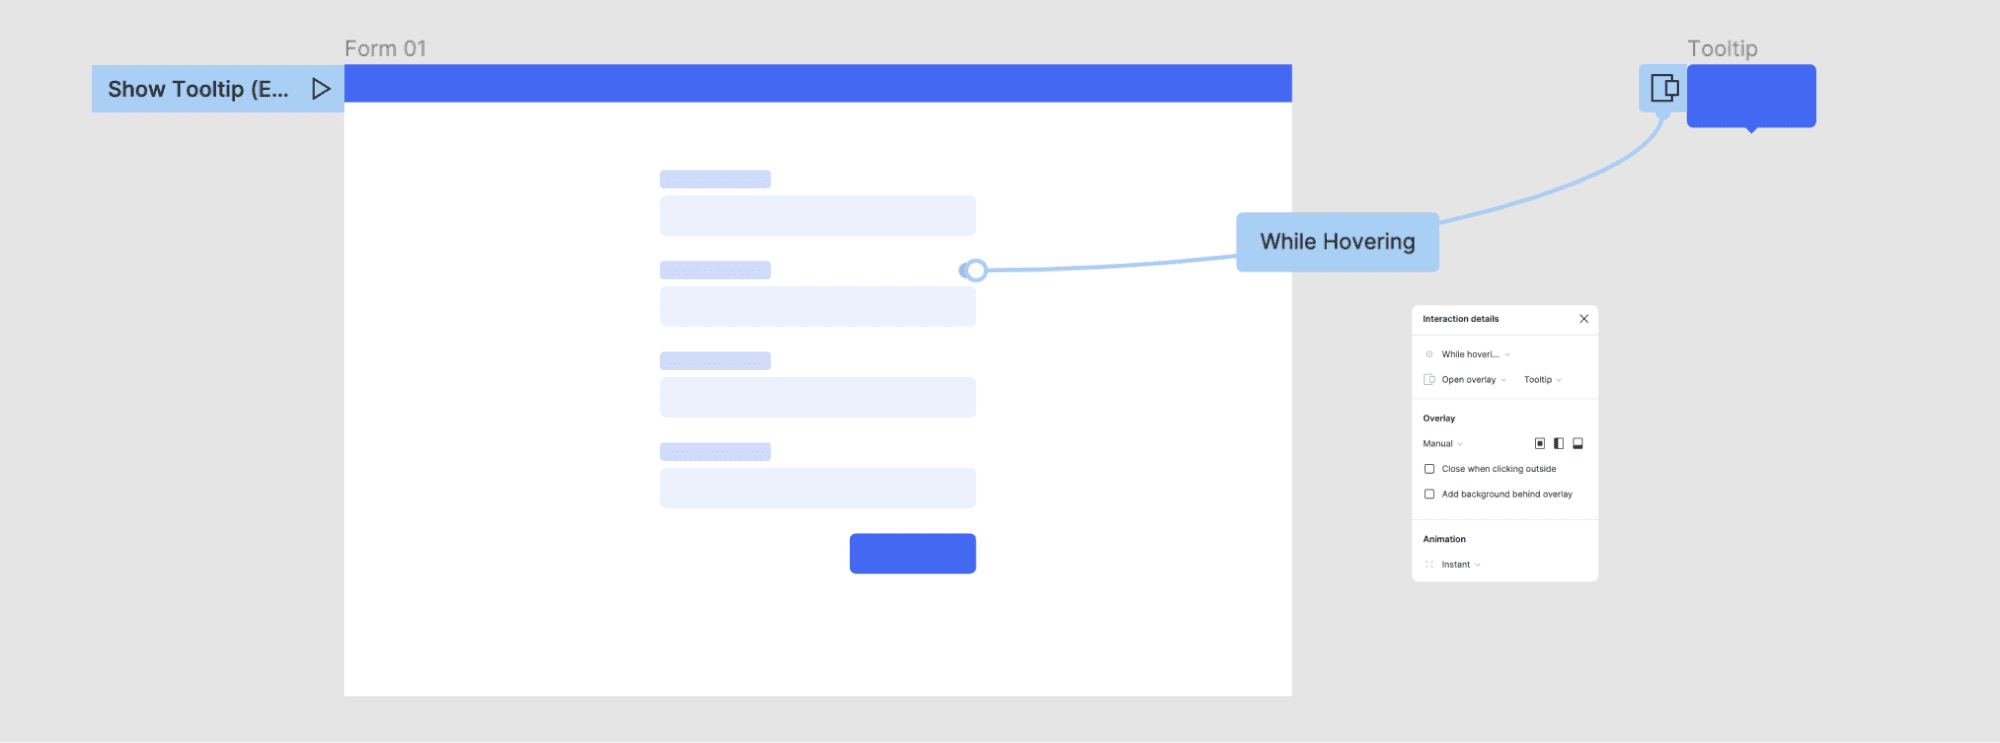
Example: show tooltip
While hovering over an icon, open overlay tooltip with an instant animation
Animated interactions
Use animations to add movement to your interactions (dissolve, move in, move out, push, slide in, slide out). Select different easing curves and adjust the time to customize the animation.
What are easing curves? Easing curves determine the speed during the beginning, middle, and end of the animation. A linear animation will move at the same speed the entire time. While an animation set to "ease in" will be slower in the beginning, then speed up. Adding an easing curve makes the animation feel softer and more realistic.
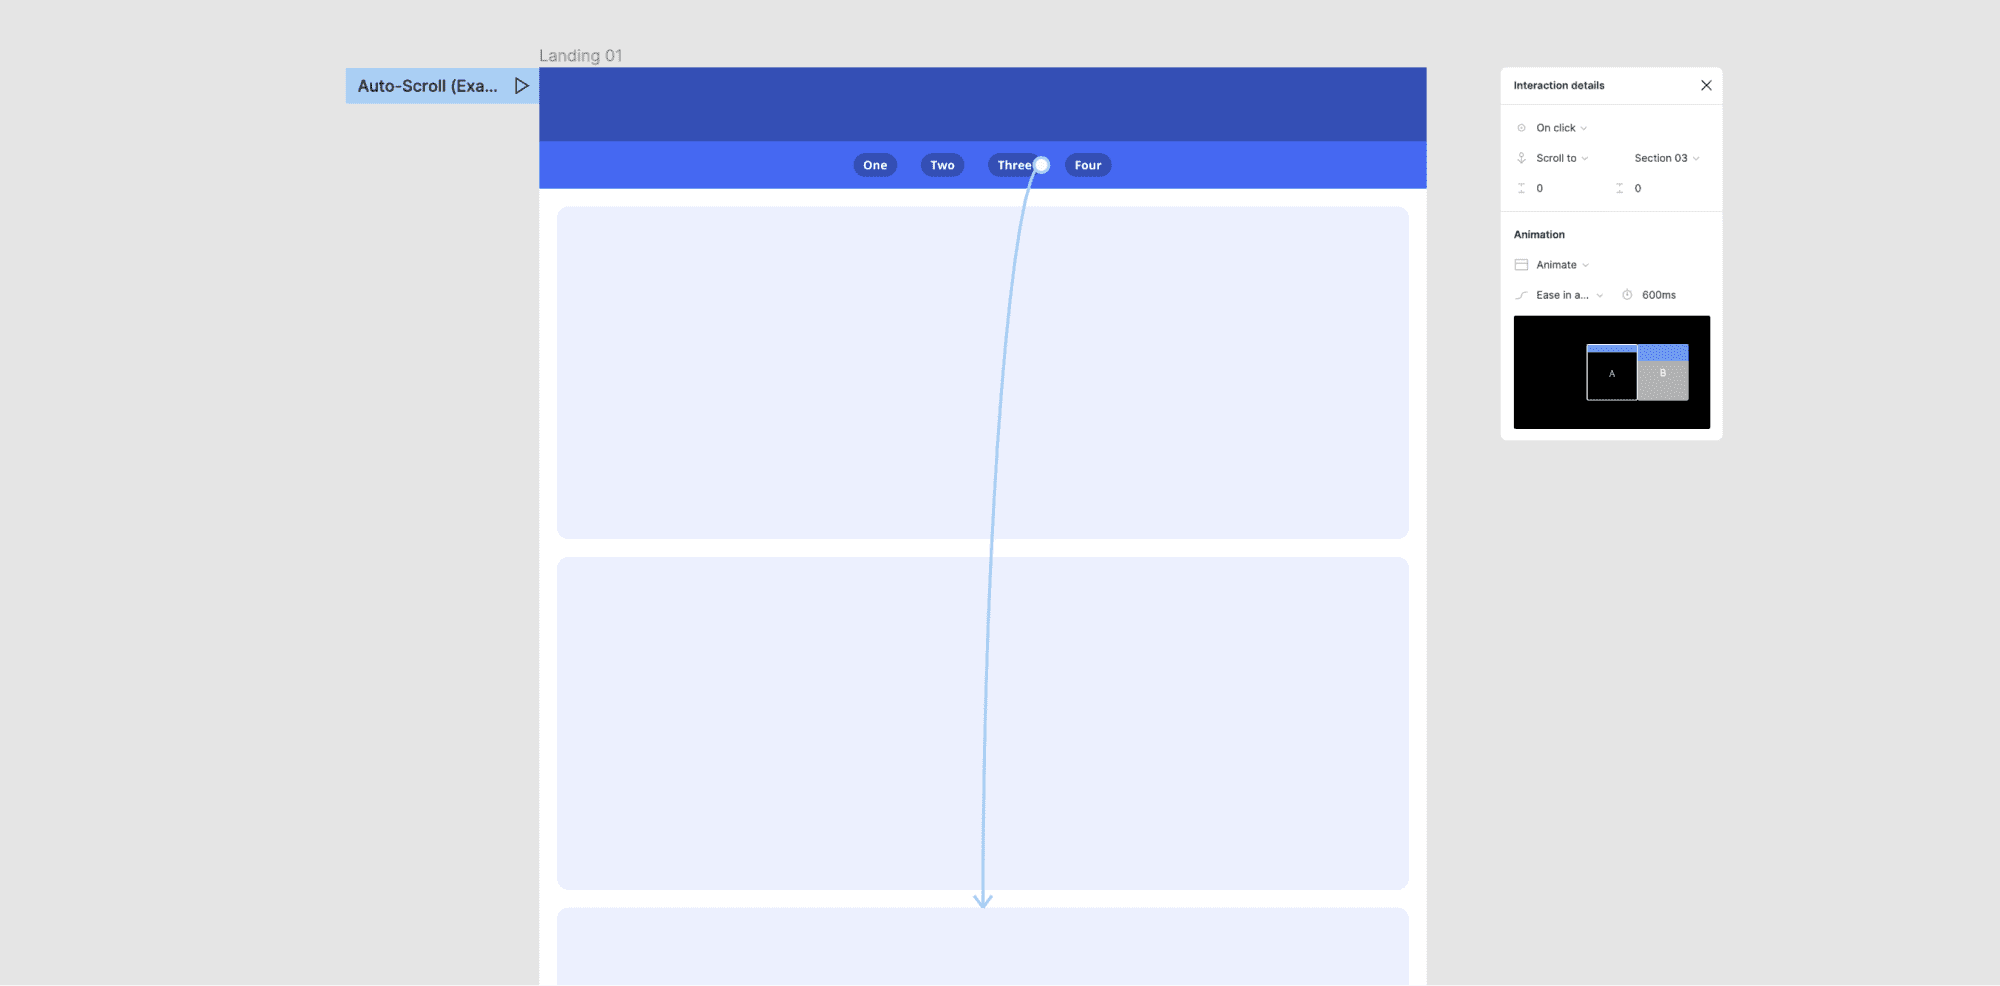
Example: auto-scroll on page
Click a button to scroll to a different section of the page with an animation. NOTE: Increase the animation time from 300ms to 600ms for a softer feeling.
Example: open & close menu drawer
Tap an icon to open overlay menu with a move in animation. THEN tap an icon to close overlay menu. NOTE: the "close overlay" action will automatically copy the "open overlay" animation settings (e.g. move in → move out).

Smart animated interactions
Use smart animate to identity matching layers on different frames and animate the difference between them. These differences can include a change in position, size, colors, etc.. Figma will know which layers match based on their name and layer order (e.g. "Container 01").
Pro tip: Check to see which layers match by hovering over them while in prototype mode.

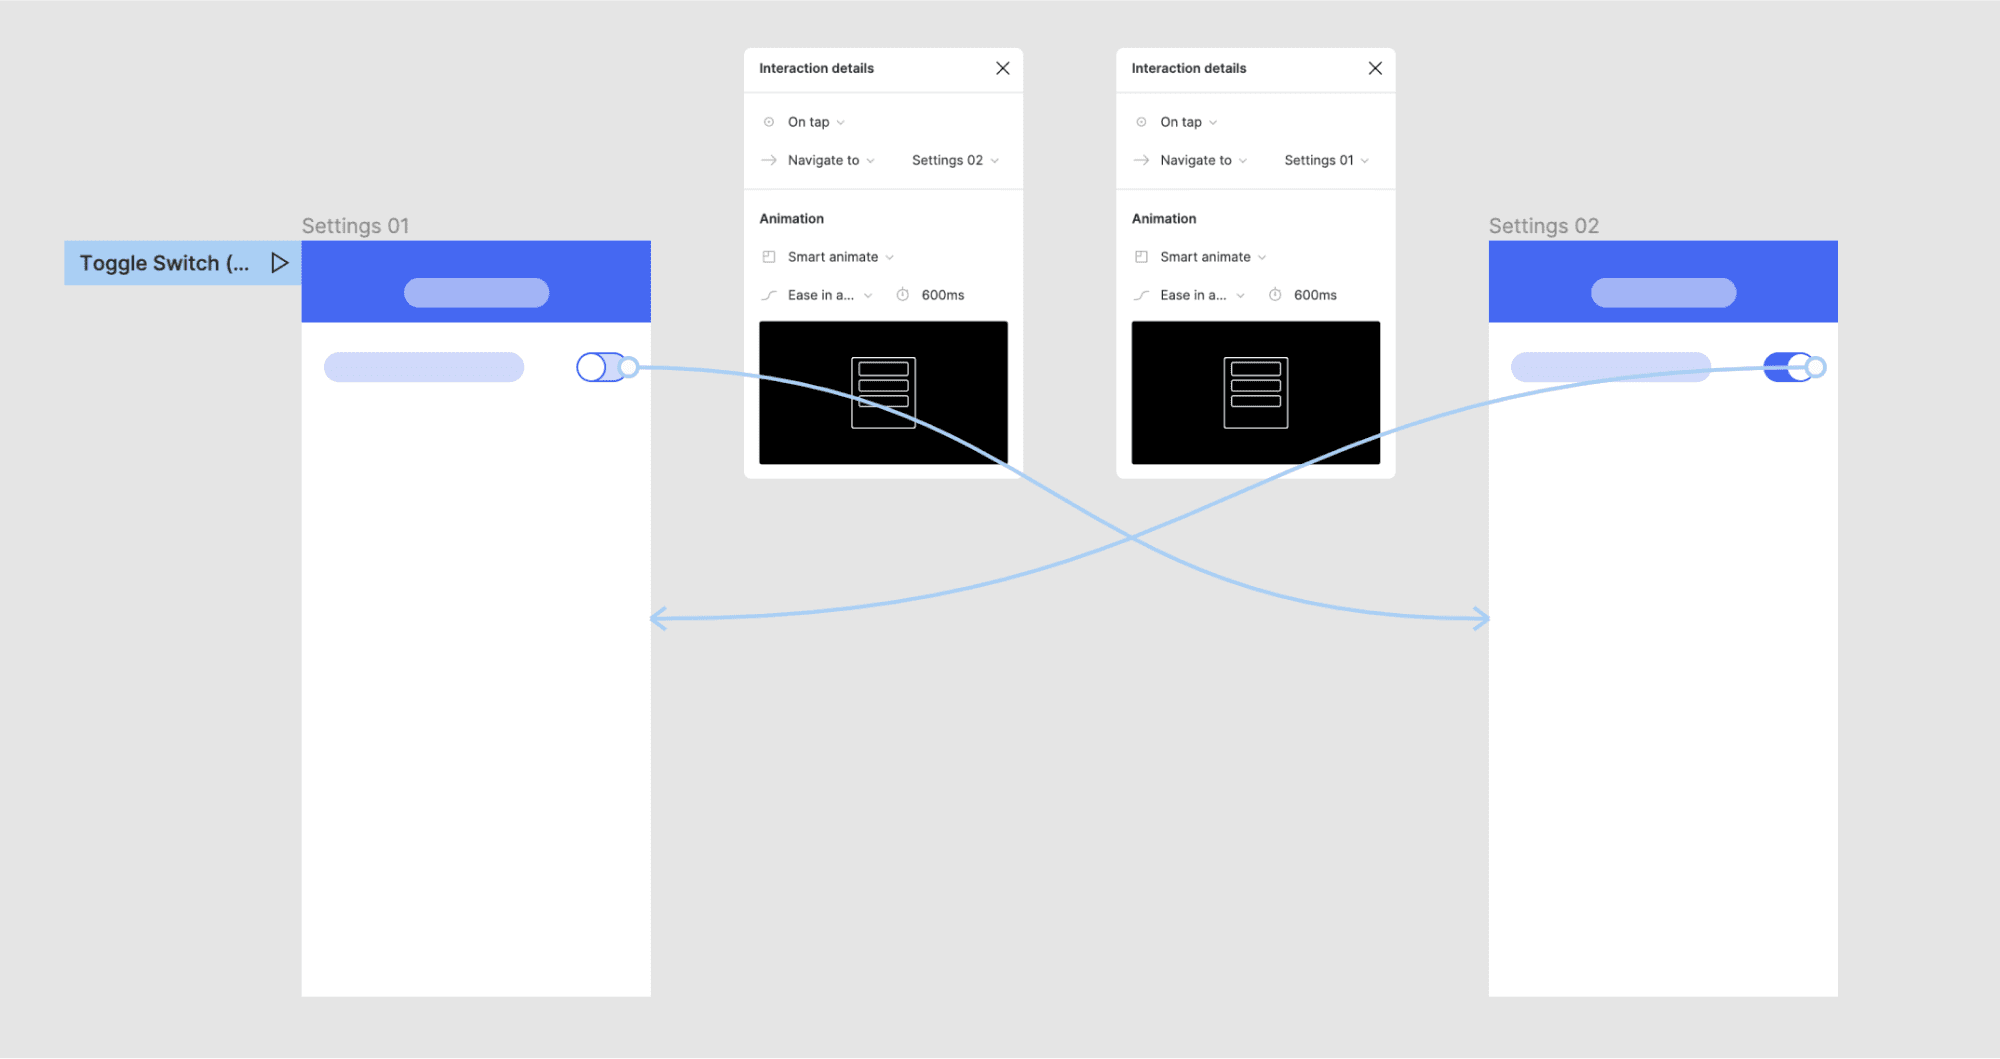
Example: toggle switch ON/OFF
Click OFF switch to navigate to ON Switch's frame with smart animation. THEN Click ON switch to navigate to OFF Switch's frame with smart animation. NOTE: the differences being animated are the position of the circle (left → right), and the size of the blue background (small → large).
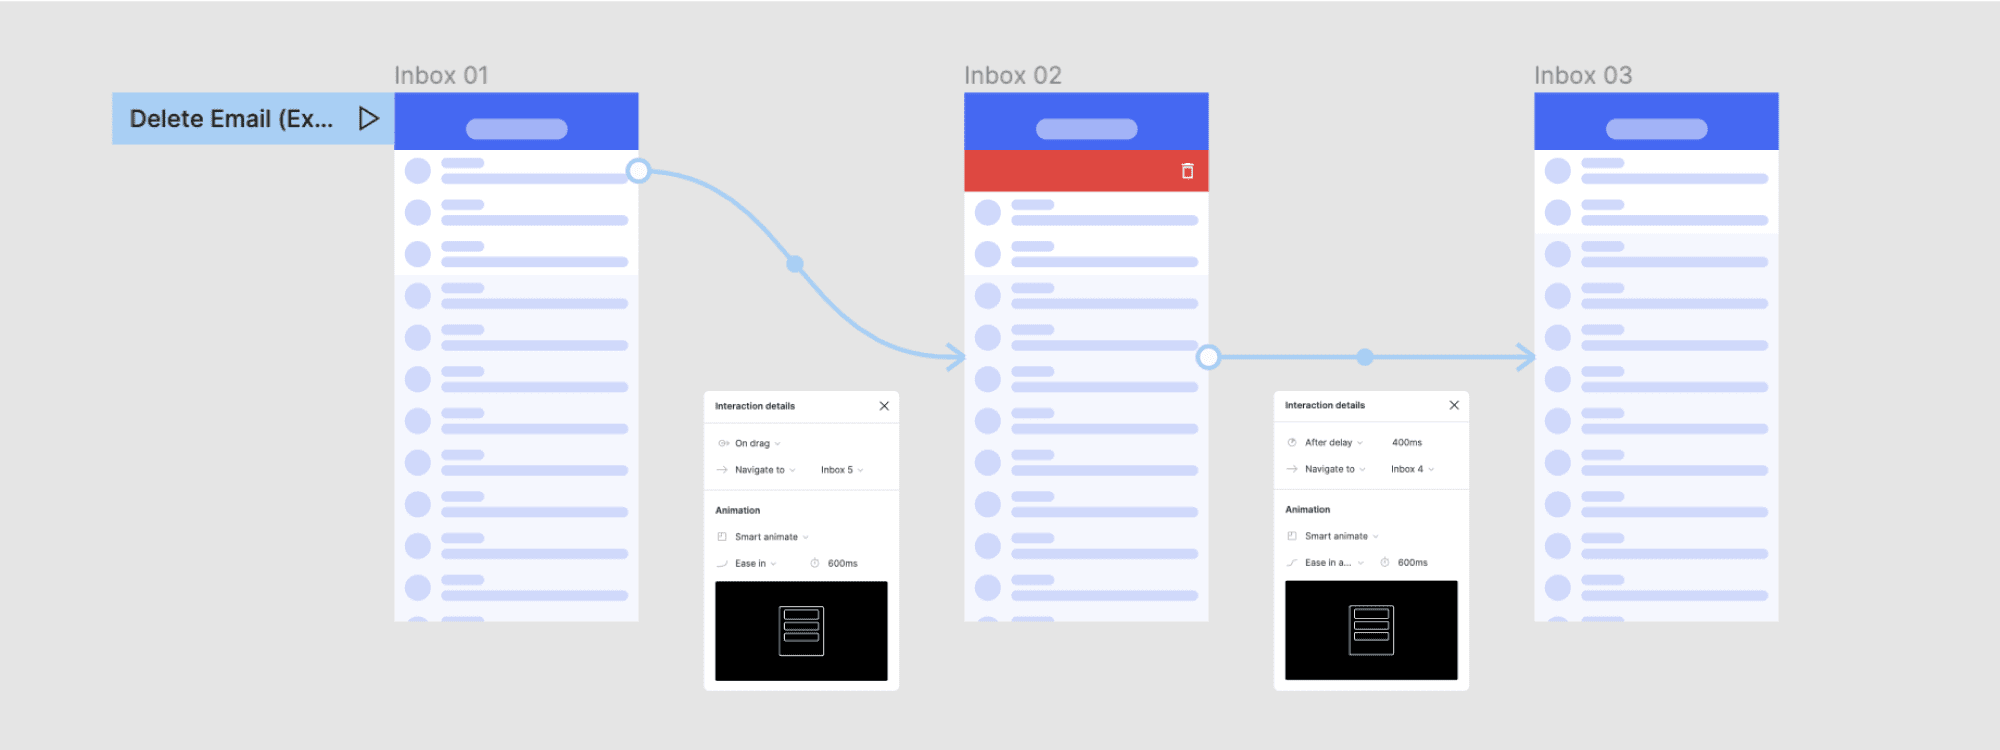
Example: delete email
Drag the email to navigate to a new frame with smart animation. THEN after a delay, navigate to a new frame with smart animation. NOTE: the differences being animated are the position of "Email 02" (in view → out of view), and the position of the emails 03-12 (lower → higher).
Pro tip: Smart animate a layer leaving or entering a frame by placing it in view on one frame, and out of view on the other. The out of view layer is still nested in the frame but is hidden due to "clip contents" being on.
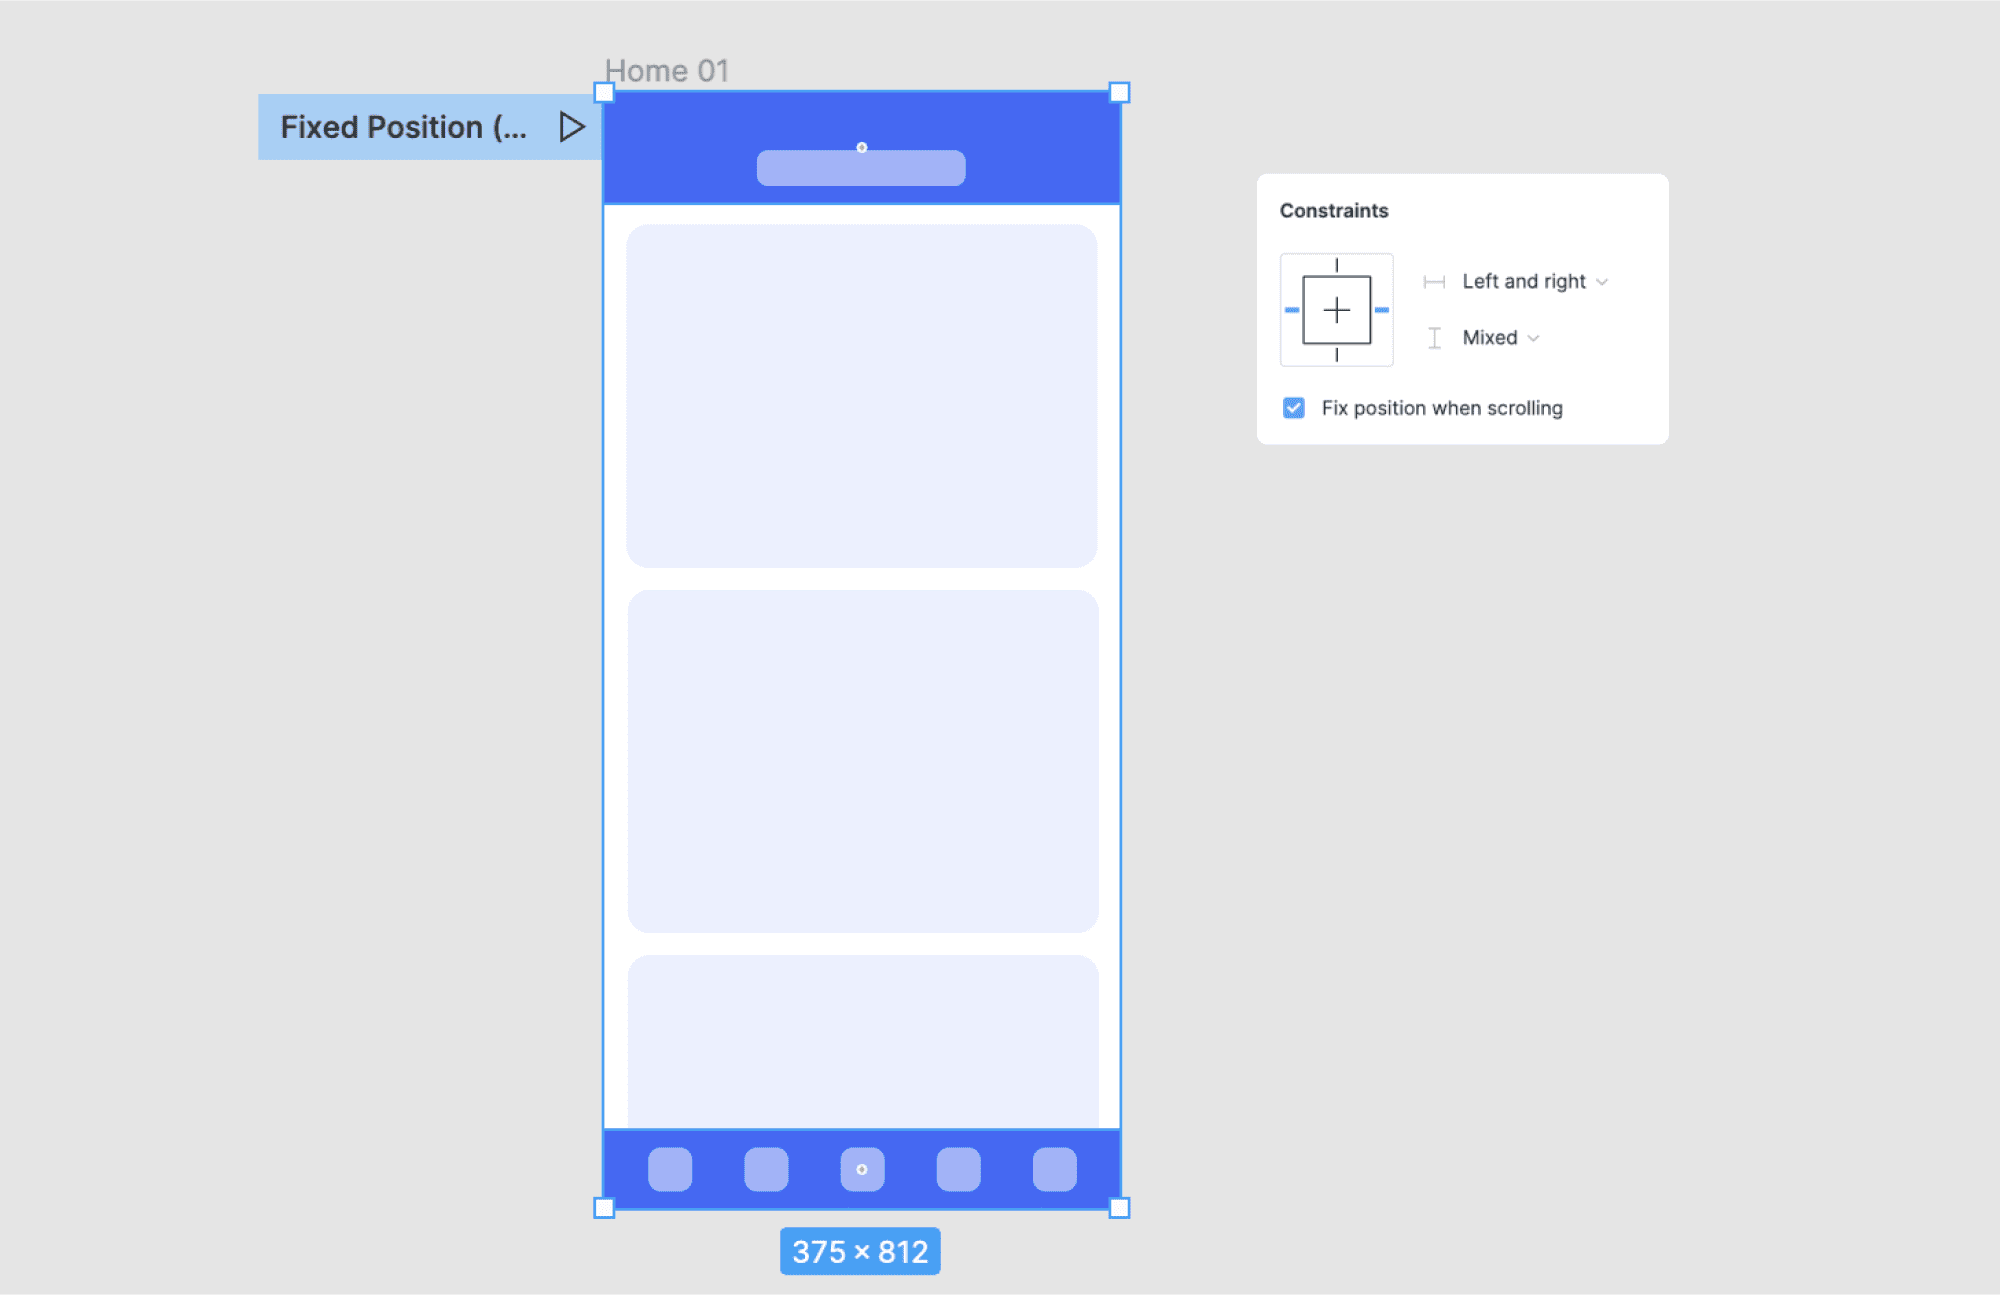
Fixed Position
Fix an element's position in your prototype so it will stay in the same location while scrolling. This is helpful for elements that you wish to always be in view (e.g. top/bottom navigation, FAB, CTA). Configure this setting in the Design Panel under "Constraints".
Example: fixed top & bottom navigation
Select layer(s) you wish to fix and choose "Fix position when scrolling"
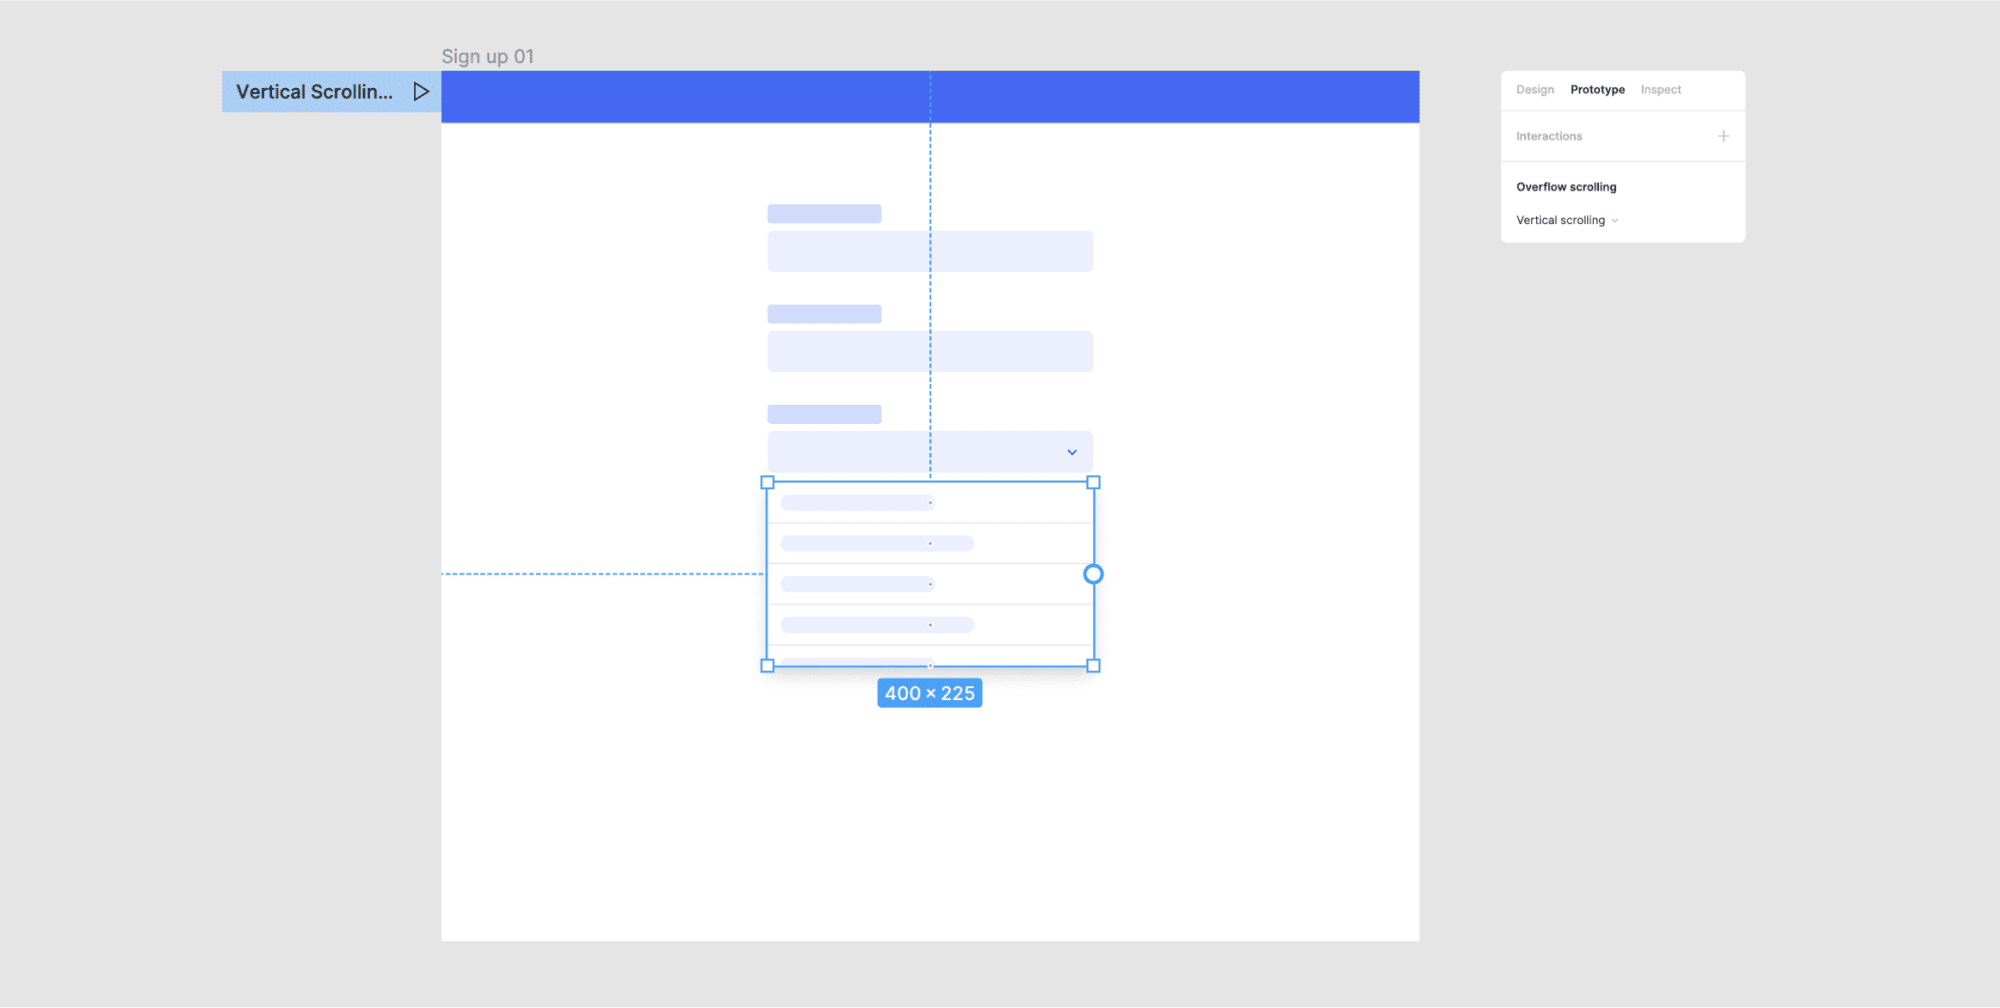
Add overflow scrolling
Overflow scrolling allows you to scroll through individual frames inside your prototype. This is helpful when prototyping UI regions or components that have their own scrolling behavior (e.g. lists, carousels, menus, tables). To use overflow scrolling, you must have a frame (not group) with nested content "overflowing" past the bounds. This content will then appear masked with "clipped content" turned on.
Example: carousel
Select frame with overflowing content and choose "Horizontal Scrolling"

Example: Menu
Select frame with overflowing content and choose "Vertical Scrolling"
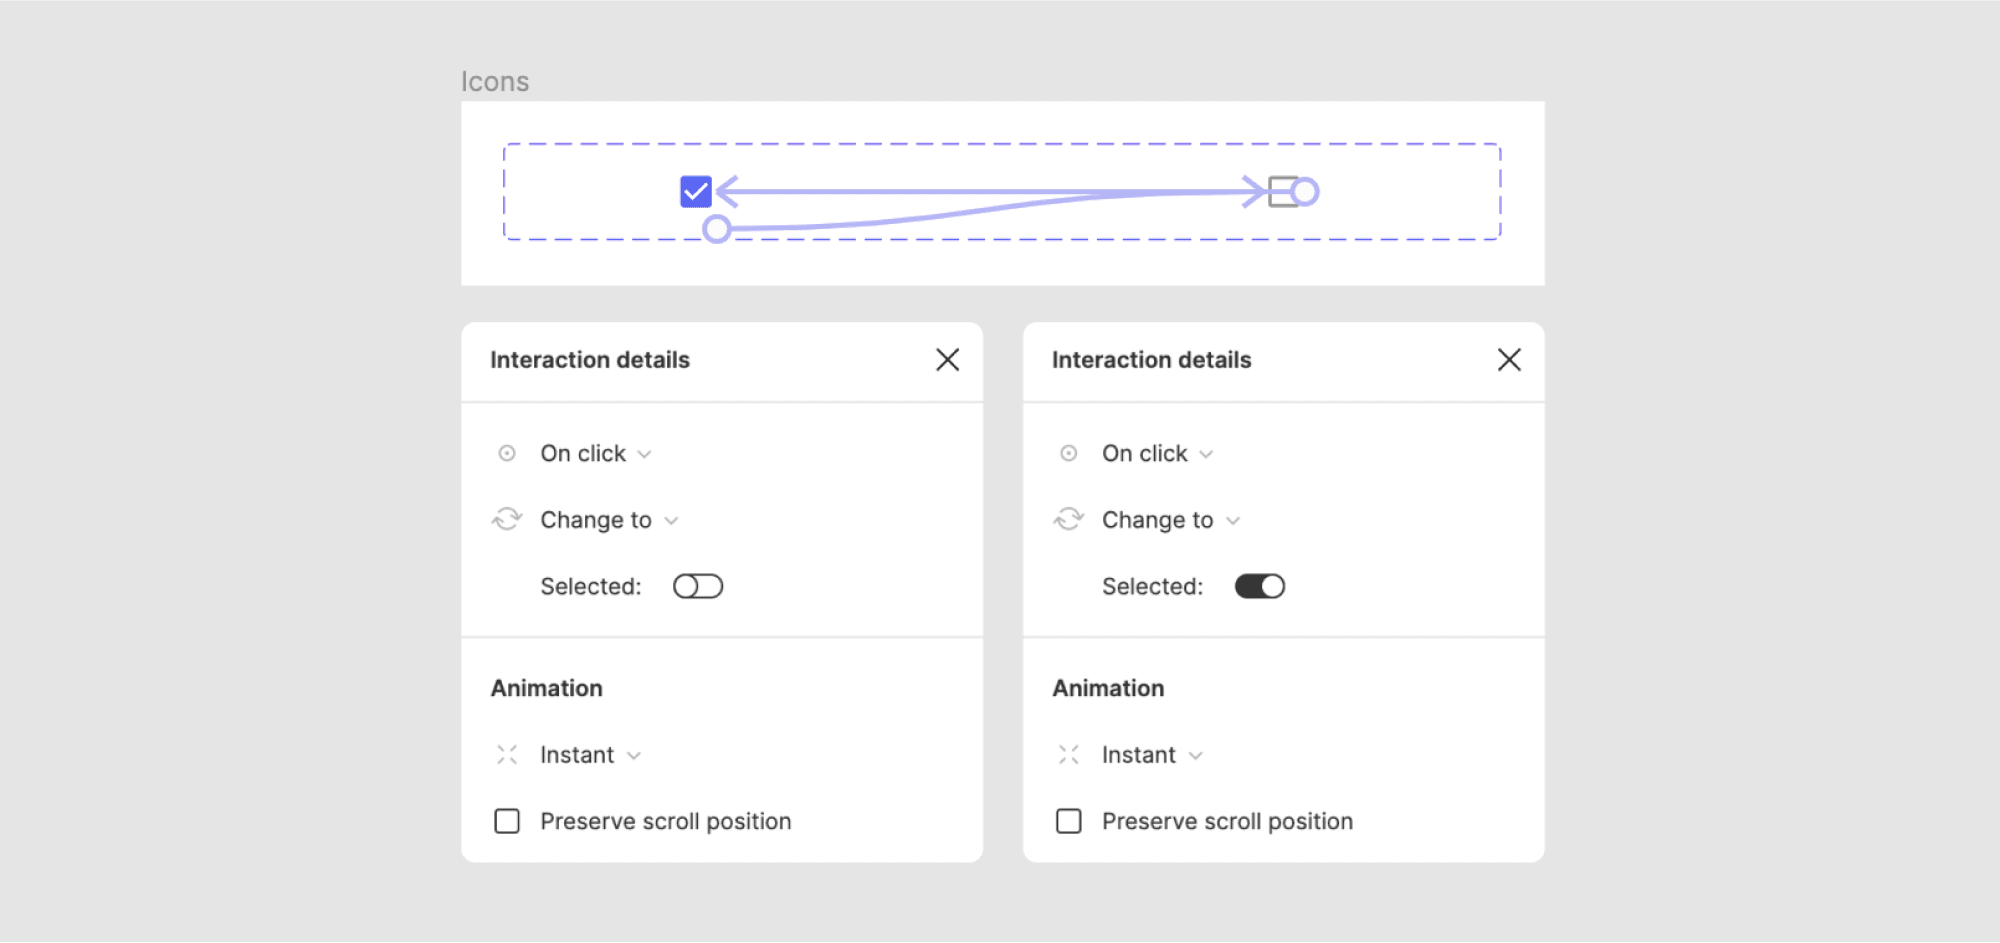
Use interactive components
Add interactions between variants in a component set. Instances of those variants will then follow their predetermined interactions in any prototype. This is particularly helpful for common, stateful, components (e.g. toggles, buttons, inputs). Defining interactions in advance makes prototyping faster and reduces the number of screens needed. Not familiar with variants? Learn more about them in Figma Variants 101
Pro tip: Interactive components are still in beta. Sign up here to get access.
Example: interactive checkbox
Click the deselected icon to change to the selected icon with an instant animation. THEN click the selected icon to change to the default icon with an instant animation. NOTE: using interactive components allows the user to select any combination of items, in any order, with no additional prototyping.
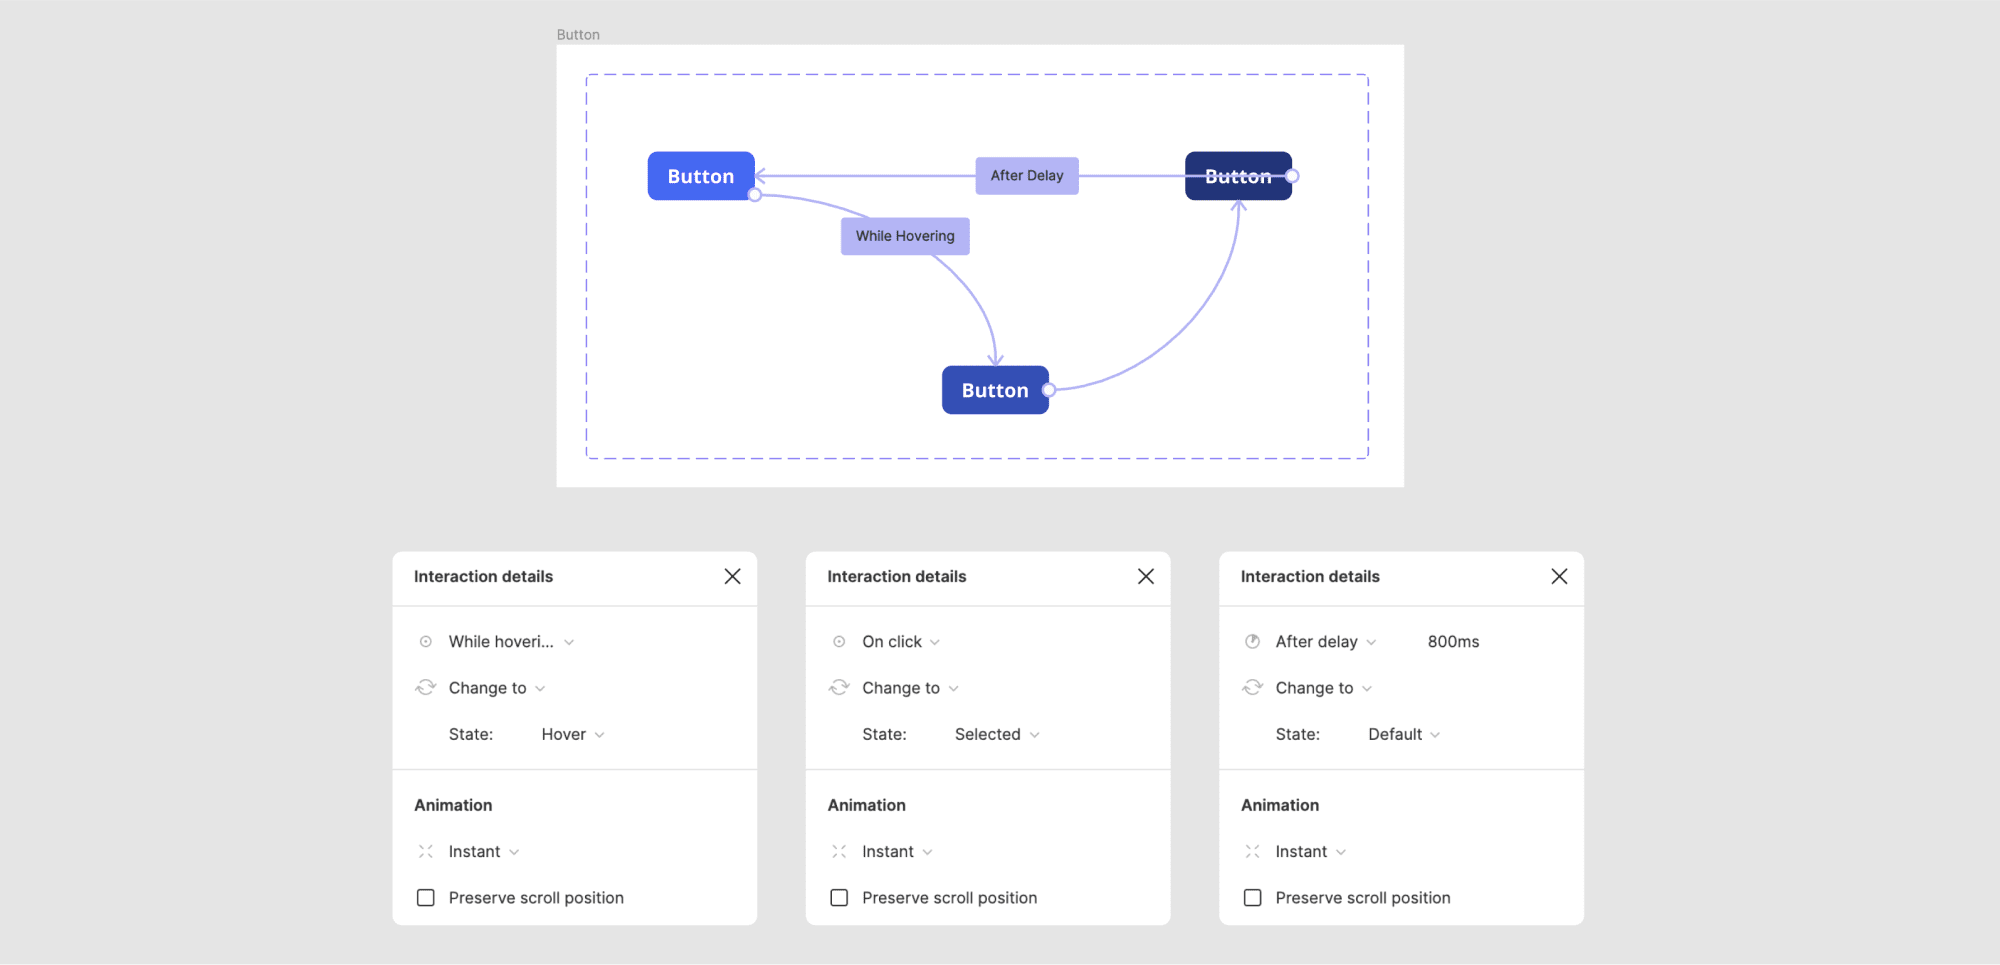
Example: interactive buttons
While hovering over the default button, change to the hover button with an instant transition. THEN click the hover button to change to the selected button. THEN after a delay on the selected button, change to the default button with an instant transition.
Interactive games
Play with ..I mean.. practice with interactive components by using these interactive games.

View prototype
Open the presentation tab to view and interact with your prototype. For a more realistic feel, select different device mockups. Anyone with access to the prototype can interact with it and leave comments for the team.
Adjust prototype settings
Open "Prototype settings" and select the device you would like your prototype to appear in (e.g. Pixel 2, ipad pro 11, custom size). This setting will apply to every prototype flow on your page. If designing for multiple devices, use multiple pages in your Figma file.
Pro tip: When designing for mobile or tablet, ensure the width of your designs match your device type (e.g. iPhone 11 = 375px width).

Present prototype
Select the "Present" icon next to your flow starting point or in the top toolbar to present the prototype. If you have multiple flows on one page, toggle between them in the sidebar. You can also add comments with at-mentions to take notes, ask questions, and leave feedback for team members. Configure additional settings in the "options" menu.
Pro tip: Use the keyboard shortcut "Z" to toggle between different settings in the "options" menu.
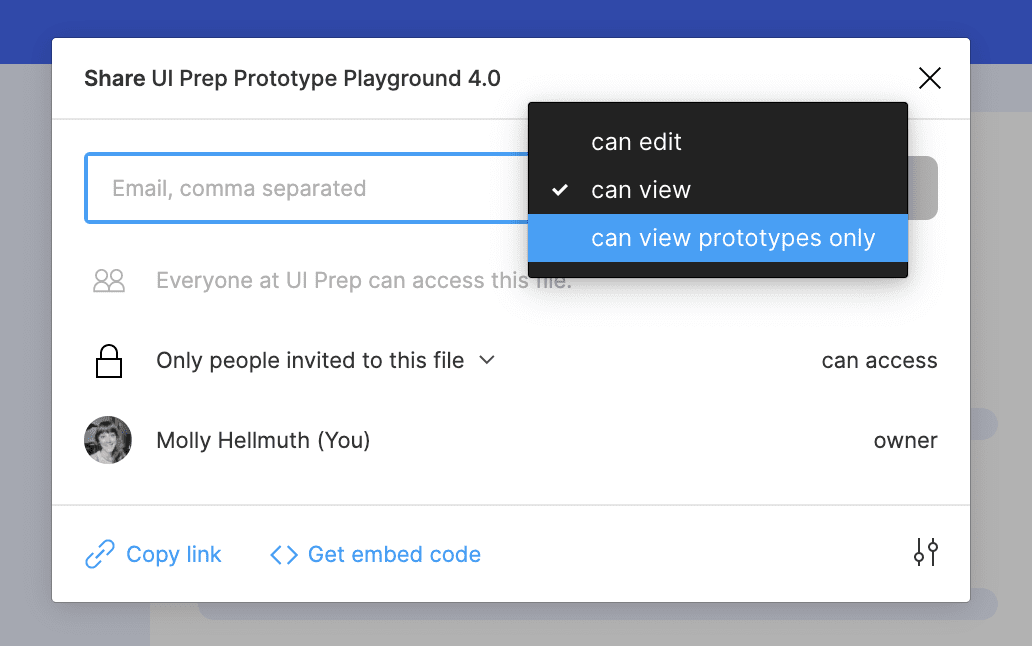
Share
Share the prototype by selecting "Share Prototype" in the presentation toolbar. To only share the prototype, and not the design file, select "can view prototypes only" in the first input.
Hands-on learning
Reading about prototypes is great, but hands-on learning is better! Learn how to build every prototype from this article with our prototype playground. Included is an example of each prototype with step-by-step instructions on how to re-create all the interactions yourself.
👉 Get the (free) Prototype Playground here

Want more design insights like this?
See our full catalog of articles covering Figma tips and Design System best practices.